 Written by Lee Nelson, on Apr
1, 2024
Written by Lee Nelson, on Apr
1, 2024 Automate Figma using Puppeteer
Learn how to update Figma variables programmatically using Puppeteer and the Figma Plugin API.
🎓 Learning outcomes
By the end of this tutorial you will have learned how to:- Create a Figma plugin with parameters
- Automate the browser using Puppeteer
- Update Figma variables using the Figma Plugin API
- Use The Color API to generate a color scheme
🚦 Prerequisits
- Figma account with variables enabled
- Figma Variable Handler Plugin (link is in the learning materials)
- Basic TypeScript knowledge
- Basic CLI experience
- Chrome browser installed (recommended)
- Figma Plugin APIs (nice to have)
- Puppeteer JS (nice to have)
Getting Started
It's been nearly one year since Figma announced the release of their highly anticipated feature, Variables. One of the most exciting aspects of the release, at least in my opinion, is the addition of variables to the REST API. It means teams can finally implement end-to-end workflows, syncing design with code. But this exciting new technology comes with a price, that's because it's only available to enterprise users. In this tutorial, we will cover an alternative method for updating Figma variables programatically, that won't cost you a thing.
Together we will build a Figma plugin that updates local color variables with values fetched from an external API. We will then automate our plugin using Puppeteer. Puppeteer is a Node.js library that provides a high-level API to control a headless Chrome browser. Puppeteer can be used to automate tasks such as form submission, UI testing, keyboard input, and more. For our use case, we will use Puppeteer to log into Figma, access our design file, and trigger our custom plugin. This method is not as elegant as the REST API, but it is a viable solution for those who do not have access to Figma's Enterprise plan. It's also a method that can be built upon to automate other tasks within Figma.
This tutorial is broken into two different steps. In step 1, we will focus on building our Figma plugin and in step 2, we will focus on automating our plugin using Puppeteer. Let's get started!
End result
Part 1: Figma
Download design file
As we move through the tutorial, we need a Figma file to test our code. A starter file has been created for you and can be downloaded from the link below.
Create Figma plugin
Now that our design file is ready, let's get started on our plugin. The objective of our plugin is to update our local Figma Variables with values fetched from The Color API. In a real-world scenario, you might consider fetching values from your source of truth, such as a Github Repository, CMS or API.
Clone the plugin repository below. If at anytime you want to view the
final working version of our plugin, checkout the finish branch.
git clone git@github.com:2-Fold/tutorial-automate-figma-with-puppeteer--figma-plugin.gitNext, let's install our dependencies. Navigate to your project directory and using your favourite package manager, install the dependencies. I'll be using NPM for this tutorial.
npm installNow let's run the plugin to make sure it is compiling without any errors.
npm run watch
Finally, we need to import our plugin to Figma. But first, let's add a
simple console log to code.ts so we can be sure it's working.
1console.log('hello world!');2figma.closePlugin();
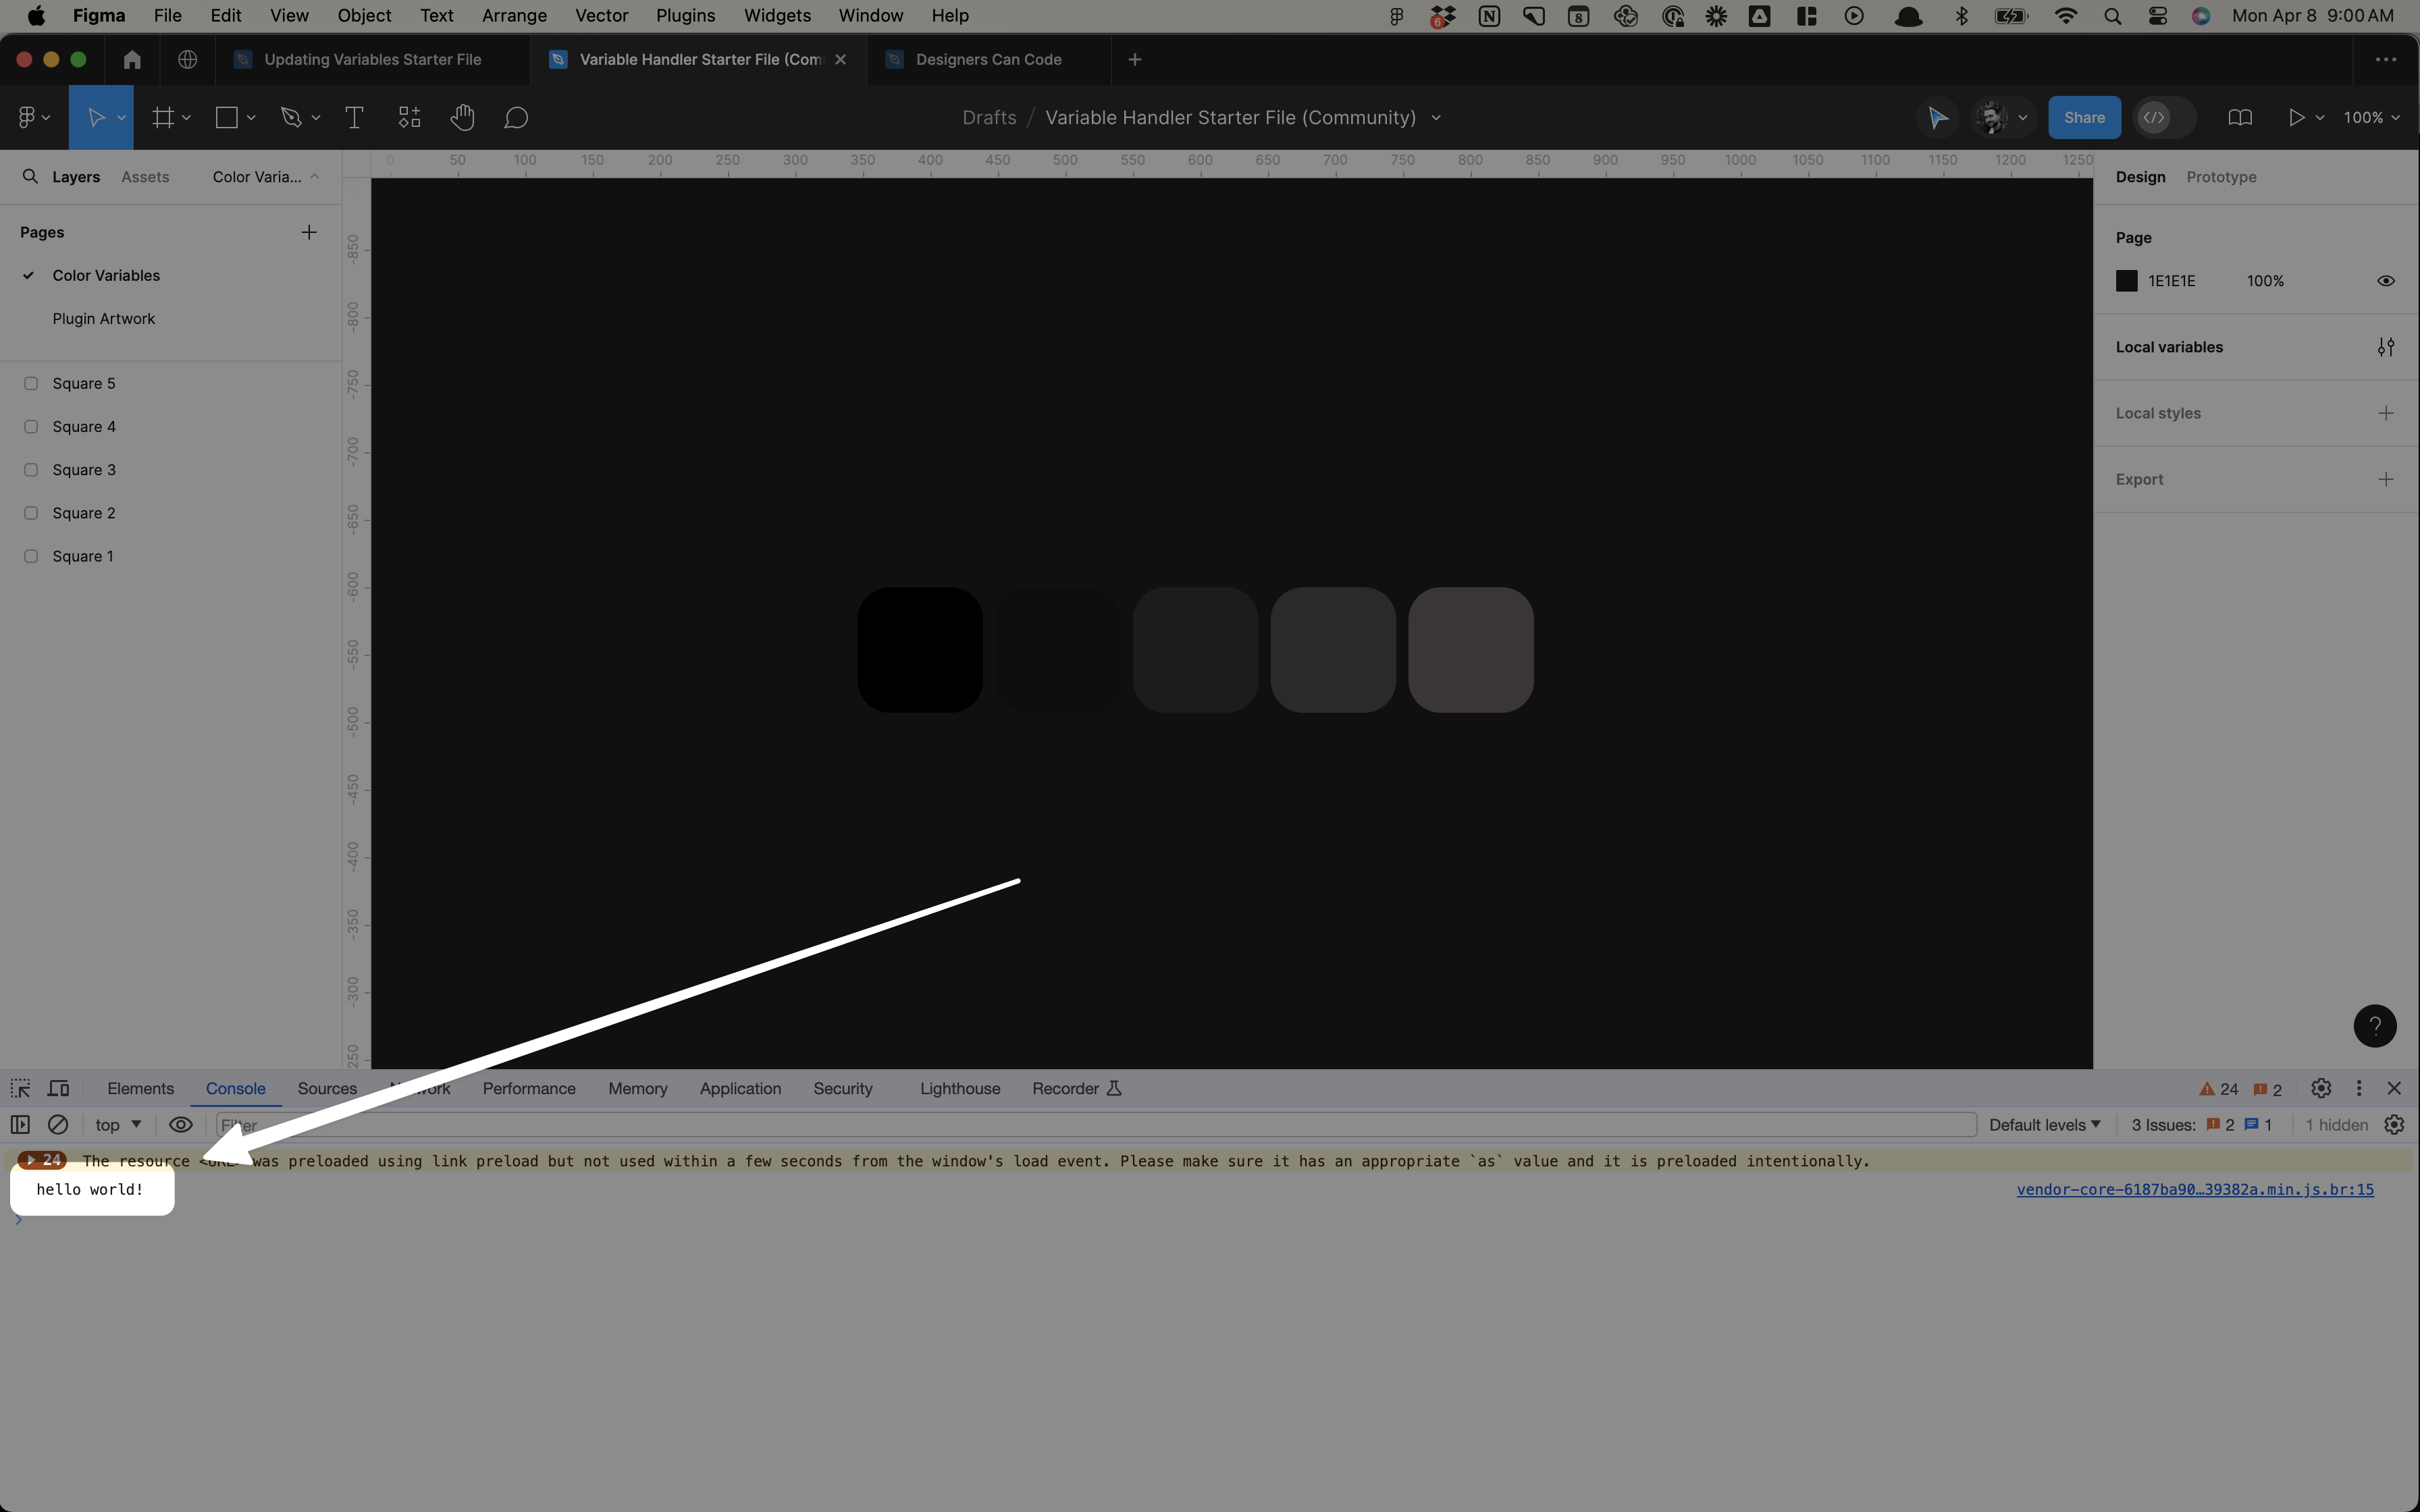
Next, open the Figma desktop app. From the global menu, navigate to: Plugins Development > Import plugin from manifest. Select the manifest.json file inside your project repository.
If everything went smoothly, you should see a hello world! message
in the console
Now that our plugin is working, we need to fetch some colors. But before we do that, let's think about our interface for a second. We only have one requirement for our interface, we need a way to accept a color value, which will be used in our request to The Color API. The API will return a color scheme based off of the color we send in the request. We could take the time to design our own UI but that would be time consuming and our UI isn't a high priority as it is not intended to be seen by users but rather automated by Puppeteer. So instead, we will use Figma Parameters.
To use Figma Parameters, we need to update our manifest.json file.
Let's add a parameter that accepts a hexidecimal value as input. We will also
add The Color API url endpoint to our list of allowed domains. This grants
us access to fetch our data, avoiding any CORS issues.
7...8"editorType": ["figma"],9"parameters": [10 {11 "name": "Color Hex",12 "key": "color-hex",13 "allowFreeform": true14 }15],16"networkAccess": {17 "allowedDomains": ["https://www.thecolorapi.com/"],18 "reasoning": "",19 "devAllowedDomains": []20},21"documentAccess": "dynamic-page"22...
Next, let's capture the value of our parameter when our plugin is run. We
will need this value in order to make a request to The Color API. Make the
following changes to code.ts.
1figma.on('run', async ({ command, parameters }: RunEvent) => {2 const colorHex = parameters3 ? parameters['color-hex']4 : 'no color-hex provided';5 console.log(colorHex);6 figma.closePlugin();7});Let's test our plugin to make sure we're capturing our parameter value correctly. When prompted, enter a value for the parameter input field. If everything went as planned, you should see the value of your parameter logged to the console.
Now that we have our parameter value, let's fetch some colors. Replace
your existing code in code.ts with the example below. Now, when
the plugin is run, we make a request to The Color API using the color value
provided by the user. We then log the response to the console and close the
plugin.
1async function getColors(seedColor: string) {2  try {3    const response = await fetch(4      'https://www.thecolorapi.com/scheme?hex=' + seedColor5    );6    return await response.json();7  } catch (error) {8    return error;9  }10}11
12figma.on('run', async ({ command, parameters }: RunEvent) => {13  // Seed color determines the color scheme14  const seedColor = parameters?.['color-hex'];15
16  if (!seedColor) {17    console.error('No seed color provided');18    figma.closePlugin();19  }20
21  const colors = await getColors(seedColor);22
23  if (!colors.colors) {24    console.error('No colors found');25    figma.closePlugin();26  }27
28  console.log(colors);29  figma.closePlugin();30});
If everything ran successfully, you should see a response from The Color API logged to your console.
Now that we have our colors, there's only one step left. We need to update our Figma Variables. We can do this by iterating over the colors returned from our API request and updating our Figma Variables with the new values.
If you're not familiar with TypeScript, don't worry about lines 1 through 12.
1interface Color {2  rgb: {3    fraction: {4      r: number;5      g: number;6      b: number;7    };8  };9}10interface PluginParameters {11  'color-hex': string;12}13
14async function getColors(seedColor: string) {15  try {16    const response = await fetch(17    'https://www.thecolorapi.com/scheme?hex=' + seedColor18    );19    return await response.json();20  } catch (error) {21    return error;22  }23}24
25async function setColorVariables(colorVariables: Color[]) {26  const localVariables = await figma.variables.getLocalVariablesAsync('COLOR');27  localVariables.forEach((variable: Variable, index) => {28    variable.setValueForMode('7:0', colorVariables[index].rgb.fraction);29  });30}31
32figma.on('run', async ({ command, parameters }: RunEvent) => {33  // Seed color determines the color scheme34  const seedColor = parameters?.['color-hex'];35
36  if (!seedColor) {37    console.error('No seed color provided');38    figma.closePlugin();39  }40
41  const colors = await getColors(seedColor);42
43  if (!colors.colors) {44    console.error('No colors found');45    figma.closePlugin();46  }47
48  console.log(colors);49  await setColorVariables(colors.colors);50  figma.closePlugin();51});
You should now have a fully functional Figma plugin that is capable of updating your local color variables with values fetched from The Color API 🎉
Part 2: Puppeteer
Create automation script
Now that we have our plugin, let's automate it using Puppeteer. Clone the repository below.
git clone git@github.com:2-Fold/tutorial-automate-figma-with-puppeteer--puppeteer.gitNavigate to your project directory and install the dependencies.
npm install
Let's start by instructing Puppeteer to open our browser. Puppeteer comes
with a version of Chromium installed but to mitigate errors, let's
instruct Puppeteer to use a local version of Chrome instead. In order to
do this, we need to find the path to our Chrome executable. Open Chrome
and enter chrome://version into the address bar. Copy the executable
path. If you don't have Chrome installed and want to use a different browser,
you can specify the path to your browser executable instead.
To see the browser in action, we're going to set the headless
option to false
6(async () => {7 await puppeteer.launch({8 executablePath:9 '/Applications/Google Chrome.app/Contents/MacOS/Google Chrome',10 headless: false,11 });12})();If we run our script, it would open an empty Chrome browser. That's pretty boring, so instead, let's navigate to our Figma file that contains our variables. The easiest way to find the URL of your Figma file is to open it inside the browser. Once you have the url, update your code as follows.
6(async () => {7 const browser = await puppeteer.launch({8 executablePath:9 '/Applications/Google Chrome.app/Contents/MacOS/Google Chrome',10 headless: false,11 });12 const page = await browser.newPage();13 await page.goto('your url here');14})();Now let's run our script
npm run startIf everything went as planned, Puppeteer should have opened an instance of Chrome and navigated to your url.
You might be able to guess what comes next. We need to instruct Puppeteer to login, search for our plugin and run it. This work involves some trial and error. First, we need to inspect the elements we want to interact with in the DOM and retrieve their unique attributes. Their unique attributes will be used for selection purposes. Once we are able to select the elements, we can perform the events needed to automate our plugin. To save us time, I've taken the liberty of providing us with the script we need below.
1import * as dotenv from 'dotenv';2import puppeteer from 'puppeteer';3import os from 'os';4
5dotenv.config();6
7const pluginSearchTerm = 'Variable Handler';8const colorScheme = '000000';9
10const credentials = {11  email: process.env.FIGMA_USER_EMAIL,12  password: process.env.FIGMA_USER_PASSWORD,13};14
15const operatingSystems = {16  mac: 'darwin',17  windows: 'win32',18};19
20const selectors = {21  loginForm: {22    emailInput: '#email',23    passwordInput: '#current-password',24    loginButton: 'button[type="submit"]',25  },26  notification: {27    dismissButton: 'button[class^="basic_form--btn"]',28  },29  navbar: {30    loginButton: '[class*="loginButton"]',31    menuDropdown: 'button[class*="toolbar_styles--enabledButton"]',32  },33  quickActionsInput: 'input[class*="quick_actions--searchInput"]',34  quickActionsParmaterInput: 'div[class^="plugin_parameter_entry"] input',35};36
37(async () => {38  // users os is used to determine which keyboard shortcut to use.39  const userOs = os.platform();40  //41  // INITIALIZE42  // Launches a new browser instance with config.43  const browser = await puppeteer.launch({44    executablePath: process.env.CHROME_PATH,45    headless: process.env.HEADLESS_MODE,46    devtools: process.env.DEVTOOLS47  });48  //49  // LOGIN50  // Navigates to Figma file.51  // Clicks on the login button in the navbar.52  // Fills out the login form with user credentials.53  const page = await browser.newPage();54  await page.goto(process.env.FIGMA_FILE_URL);55  await page.waitForSelector(selectors.navbar.loginButton);56  await page.click(selectors.navbar.loginButton);57  await page.waitForSelector(selectors.loginForm.emailInput);58  await page.type(selectors.loginForm.emailInput, credentials.email);59  await page.type(selectors.loginForm.passwordInput, credentials.password);60  await page.click(selectors.loginForm.loginButton);61  console.log('✅ Submitted login form');62  //63  // DISMISS NOTIFICATION64  // Dismisses the notification about opening the desktop app.65  await page.waitForNavigation();66  await page.waitForSelector(selectors.notification.dismissButton);67  await page.click(selectors.notification.dismissButton);68  console.log('✅ Dismissed notification');69  //70  // RUN PLUGIN71  // Searches for plugin using quick actions (cmd+/) or (ctrl+/).72  // Opens and runs the plugin.73  await page.bringToFront();74  const rootKey = userOs === operatingSystems.mac ? 'Meta' : 'Control';75  await page.keyboard.down(rootKey);76  await page.keyboard.press('/');77  await page.keyboard.up(rootKey);78  await page.waitForSelector(selectors.quickActionsInput);79  await page.type(selectors.quickActionsInput, pluginSearchTerm);80  await page.keyboard.press('Enter');81  await page.type(selectors.quickActionsParmaterInput, colorScheme);82  await page.keyboard.press('Enter');83  console.log('✅ Plugin opened');84  console.log('✅ Variables updated');85})();
Before we can run this script, there are a few changes that need to be
made. First, we need to create some environment variables. Our dotenv
package has been initialized on line 5, so all that's left to do is create
a
.env file at the root of our project and add the following variables.
1# Puppeteer Config2HEADLESS_MODE="false"3DEVTOOLS="false"4CHROME_PATH="/Applications/Google Chrome.app/Contents/MacOS/Google Chrome"5
6# Figma7FIGMA_USER_EMAIL="<your email>"8FIGMA_USER_PASSWORD="<your password>"9FIGMA_FILE_URL="<your file url>"
Enter your Figma user credentials. If you're working in a team environment, you might want to consider creating a new user account for all bot related tasks.
We're almost there! The last two items we need to discuss are pluginSearchTerm and colorScheme
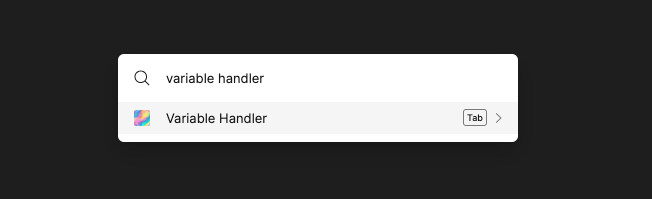
7const pluginSearchTerm = 'Variable Handler';8const colorScheme = '000000';9... pluginSearchTerm is the value entered into Figma's quick actions
dialog. The dialog can be viewed in Figma by pressing cmd + /
or
ctrl + /. Our script is written to select the first result in
the dialog, which is why it's important that the pluginSearchTerm value matches the name of your plugin exactly.
If you're familiar with plugins, you might have noticed that the image above is using a production version of the Variable Handler plugin. The reason is, development versions can only be run in Figma desktop and our script only works in the browser. Until you publish your own plugin to the Figma Community, you won't be able to automate it. For that reason, we will all use the production version of Variable Handler for the remainder of this tutorial.
More on how to publish your plugin here. Once published, install your plugin and update the pluginSearchTerm to match your plugin name.
If you updated pluginSearchTerm in the previous step, please revert
it back to "Variable Handler" and then install the Variable Handler plugin
below.
7const pluginSearchTerm = 'Your plugin name';8const pluginSearchTerm = 'Variable Handler';9...Install Variable Handler Plugin
Update colorScheme with a 6 digit hexidecimal code.
8const colorScheme = '000000';9...Now run the script!
npm run startIf everything went as planned, you should see Puppeteer open a browser, login to Figma, search for the Variable Handler plugin and update your variables.
If your script isn't working, please checkout the finish branch.
It contains a working version and is refactored for legibility. It also contains
a working example for SSO.
Next steps
Although the use case in this tutorial was focused on updating variables, the method can be applied anywhere. Get creative! Just remember, this is a brittle workflow. There are many variables (no pun intended) that can cause our script to fail.
In a subsequent tutorial, we will take what we have learned here and integrate it into a continuous integration workflow. We will look at ways to run our script remotely making it much more valuable.